Have you ever wondered how to curl your eyelashes without using an eyelash curler? Maybe you don’t have one, or you don’t like the way it pinches your lashes, or you just want to try something different. Well, there is a simple and effective hack that you can use to curl your lashes with a common household item: a spoon!
Yes, you read that right. A spoon can help you achieve beautiful, curled lashes in just a few minutes. All you need is a clean metal teaspoon, some warm water, a cloth, and your favorite mascara. In this blog post, we will show you how to curl your eyelashes with a spoon, step by step, and answer some frequently asked questions about this technique.
How to Curl Your Eyelashes with a Spoon: Step by Step Guide
Here are the steps to follow to curl your eyelashes with a spoon:
- Heat a teaspoon in a glass of warm water for 3 minutes. Fill a glass halfway with warm water, and place the clean metal teaspoon in head-down. Leave the spoon to heat up for 3 minutes. Avoid using a large spoon as this will make it harder to press the lashes against the spoon.
- Dry the spoon. Remove the spoon from the water and dry it with a clean cloth. Wet lashes won’t form or hold a curl well.
- Hold the inside of the spoon over your eyelid. Hold the spoon horizontally and press the inside of the curve against your eyelid. The rounded outside face of the spoon will be used to curl your lashes. Check the temperature of the spoon on your wrist before bringing it up to your eye. If it feels uncomfortably hot on your wrist, allow it to cool for a minute.
- Press the top lashes against the spoon for 10 seconds. Pull the top lashes back against the curve of the spoon using your fingertips. Hold the base of the top lashes against the outside face of the spoon for 10 seconds to help set the curls. The curve of the heated spoon will help to set the top lashes into a curled position.
- Check for any lashes that haven’t curled well. Look in the mirror to see if any of the lashes haven’t curled properly. The lashes on the corners of the eyes don’t always curl well on the initial curling. Repeat the curling process but concentrate on holding the remaining straight lashes against the spoon.
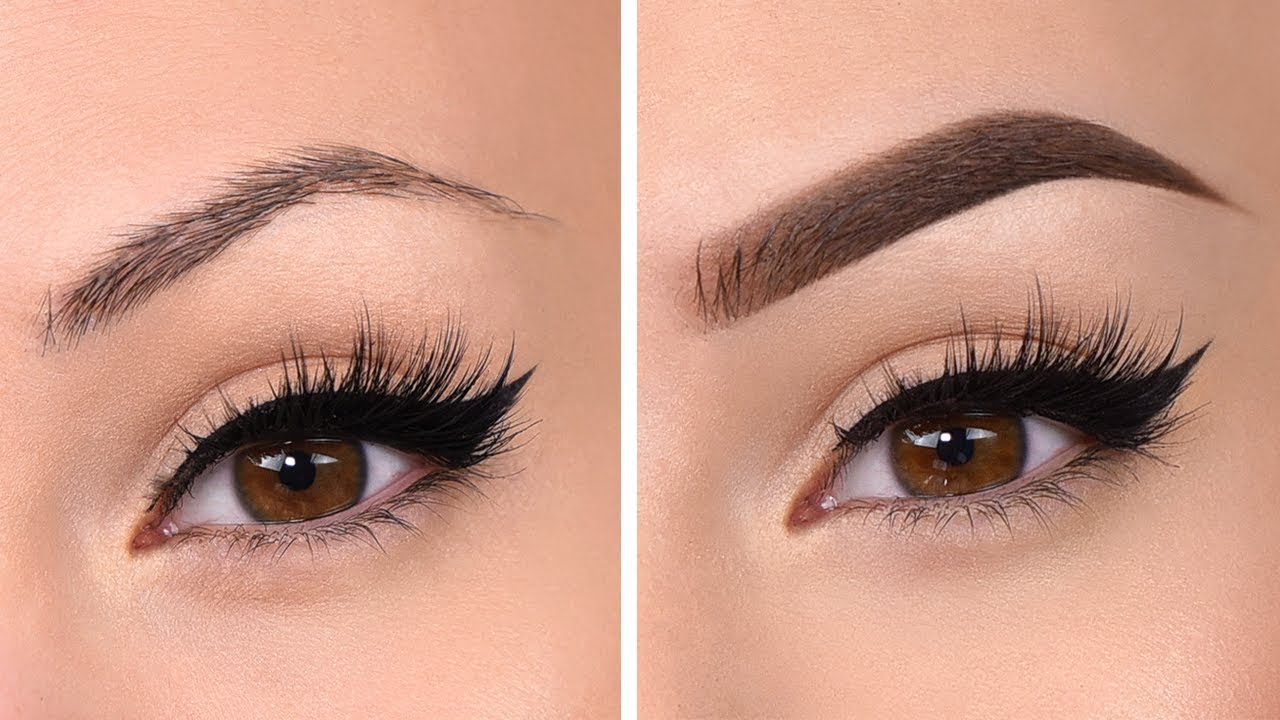
- Sweep the mascara from the bottom to the top of your lashes. Stand in front of a mirror and look straight ahead. Bring the mascara brush to the roots of your top lashes and sweep the brush up, following the curve of your lashes. The mascara will help to set your curls in place. If you accidentally get any mascara in your eye, liberally use water to rinse your eye.
- Apply a second coat if you want a fuller look. Sweep the brush over your lashes again, follow the same process as for the first coat. The second coat of mascara will coat any lashes that were missed in the first application and will make your lashes look fuller. If you prefer a more natural, thinner lash, skip the second layer. If you’re wanting an even fuller look, apply a third layer.
- Coat your bottom lashes with mascara. Tilt your chin towards your body to stop the mascara marking your under-eyes.
And that’s it! You have successfully curled your eyelashes with a spoon. Enjoy your beautiful, curled lashes!
FAQs about Curling Eyelashes with a Spoon
Here are some common questions and answers about curling eyelashes with a spoon:
- Why does a spoon work to curl eyelashes? A spoon works to curl eyelashes because of two factors: the shape and the heat. The curved shape of the spoon mimics the shape of an eyelash curler, and the heat helps to set the curl in place. The metal of the spoon also conducts heat well, which makes it more effective than other materials.
- Is curling eyelashes with a spoon safe? Curling eyelashes with a spoon is generally safe, as long as you are careful and gentle. Make sure to sanitize the spoon before using it, and check the temperature of the spoon on your wrist before bringing it near your eye. Do not press too hard or pull too much on your lashes, as this can damage them or cause them to fall out. If you feel any pain or discomfort, stop immediately and consult a doctor if necessary.
- How long does the curl last? The curl from a spoon can last for several hours, depending on your lash type and the quality of your mascara. To make the curl last longer, you can apply a waterproof or long-lasting mascara, or use a setting spray on your lashes. You can also touch up the curl throughout the day by repeating the spoon technique.
- What are the benefits of curling eyelashes with a spoon? Curling eyelashes with a spoon has several benefits, such as:
- It is easy and convenient. You don’t need any special tools or equipment, just a spoon and some warm water. You can do it anywhere, anytime, as long as you have access to these items.
- It is cheap and eco-friendly. You don’t have to buy or replace an eyelash curler, which can save you money and reduce waste. You can also reuse the same spoon for other purposes, such as eating or cooking.
- It is gentle and natural. You don’t have to use any chemicals or heat on your lashes, which can dry them out or damage them over time. You also don’t have to worry about pinching or breaking your lashes with an eyelash curler, which can be painful and unsightly.
Conclusion
Curling your eyelashes with a spoon is a simple and effective hack that can give you beautiful, curled lashes in minutes. All you need is a clean metal teaspoon, some warm water, a cloth, and your favorite mascara. Follow the steps in this guide and enjoy the results!
We hope you found this blog post helpful and informative. If you have any questions or comments, feel free to leave them below. And if you liked this post, please share it with your friends and family who might also benefit from this technique. Thank you for reading!
 By
Your Beauty Plug
By
Your Beauty Plug